Collapse-O-Matic Content Filtering

Without Filter Attribute (default off)

Plain Text

[expand title="plain text"]This is just some blibber blabber text[/expand]
plain text
This is just some blibber blabber text

Text with Shortcode

[expand title="text with shortcode"]This is text with a shortcode [tminus_launch_date cid="1921" format="Y-m-d"][/expand]
text with shortcode
This is text with a shortcode [tminus_launch_date cid=”1921″ format=”Y-m-d”]

With Filter Attribute False

Plain Text

[expand title="plain text" filter="false"]This is just some blibber blabber text[/expand]
plain text
This is just some blibber blabber text

Text with Shortcode

[expand title="text with shortcode" filter="false"]This is text with a shortcode [tminus_launch_date cid="1921" format="Y-m-d"][/expand]
text with shortcode
This is text with a shortcode [tminus_launch_date cid=”1921″ format=”Y-m-d”]

With Filter Attribute True

Plain Text

[expand title="plain text" filter="true"]This is just some blibber blabber text[/expand]
plain text

This is just some blibber blabber text

Text with Shortcode

[expand title="text with shortcode" filter="true"]This is text with a shortcode [tminus_launch_date cid="1921" format="Y-m-d"][/expand]
text with shortcode

This is text with a shortcode [tminus_launch_date cid=”1921″ format=”Y-m-d”]

Print-O-Matic Icon Inline-Block CSS

This is how you modify the print-icon to have it show up in a simple menu. If we start with a simple right-aligned menu:

<p style="text-align: right;"><span class="expandall">Expand All</span> | <span class="collapseall">Collapse All</span> | [print-me]</p>

See how the icon jumps to it’s own line?

Expand All | Collapse All |

Let’s fix that.

Step one, assign a some new CSS rules for an id element:

#my_print_id {
    display: inline-block;
}
#my_print_id:before,  #my_print_id:after{
    content: none;
}

Step two, insert a roll-your-own* version of the shortcode like so:

<p style="text-align: right;"><span class="expandall">Expand All</span> | <span class="collapseall">Collapse All</span> | <span class="printomatic pom-small" id="my_print_id"><input type="hidden" id="target-my_print_id" value="article"></span></p>

BAM, it’s working*:

Expand All | Collapse All |

*Note: the roll-your-own method shown above only works for print-o-matic versions 1.5.7 and older. This will not work with print-pro-matic or versions 1.6.0 or newer.

Now lets’s try something new. We have added tag and class attributes to version 1.6.0 so we can now do something like:

The Jedi Way

.my_print_class {
    display: inline-block;
}
.my_print_id:before, .my_print_id:after{
    content: none;
}

And we add our shortcode with the new tag and class attributes:

<p style="text-align: right;"><span class="expandall">Expand All</span> | <span class="collapseall">Collapse All</span> | [print-me printstyle="pom-small" class="my_print_class" tag="span"]</p>

Expand All | Collapse All |

Collapse Commander Templates

Test of the new Template feature in Collapse Commander. Template 1885 should expand the target above the trigger.

[expand title="Trigger Text" template_id="1885"]This is a test using template number 1885[/expand]
Trigger Text
This is a test using template number 1885

Example using cid:

[expand cid="2039"/]

Alt Test

This is a test of the alt tag in a expand element

Expand Trig:

I’m a little donkey

Expand Targ:

short and stout
short and stout
Stuck in a manhole cover until someone pulled me out.

Grouping Collapse-Pro-Matic Setall Subexpands

Introducing ‘togglegroup’ a new attribute that can be used instead of rel and highlander grouping for collapseall/expandall/setall toggles.
Here is a list of expand elements with nested expansub elements:

[expand title="main 1" rel="main-highlander" togglegroup="group_1"] This is the first main section and it has multiple sub sections:
[expandsub1 title="sub a" rel="sub-highlander" togglegroup="group_1"]sub section a[/expandsub1]
[expandsub1 title="sub b" rel="sub-highlander" togglegroup="group_1"]sub section b[/expandsub1]
[expandsub1 title="sub c" rel="sub-highlander" togglegroup="group_1"]sub section b[/expandsub1]
[/expand]
[expand title="main 2" rel="main-highlander" togglegroup="group_1"] This is the second main section and it has multiple sub sections:
[expandsub1 title="sub d" rel="sub-highlander" togglegroup="group_1"]sub section d[/expandsub1]
[expandsub1 title="sub e" rel="sub-highlander" togglegroup="group_1"]sub section e[/expandsub1]
[expandsub1 title="sub f" rel="sub-highlander" togglegroup="group_1"]sub section f[/expandsub1]
[/expand]

And here is a list of the different types of expandall/collapseall and toggle triggers that may be used.

Shortcode

[expand title="Expand All" swaptitle="Collapse All" trigclass="setall"/]
[expand title="Expand Main" swaptitle="Collapse Main" trigclass="setall" rel="main-highlander"/]
[expand title="Expand Sub" swaptitle="Collapse Sub" trigclass="setall" rel="sub-highlander"/]
[expand title="Expand Group 1" swaptitle="Collapse Group 1" trigclass="setall" togglegroup="group_1" /]

Roll-Your-Own

<span class="expandall">Expand All</span>

<span class="collapseall">Collapse All</span>

<span class="collapseomatic setall noarrow" id="my_toggle_id" title="Expand All">Expand All Toggle</span>
<span id="swap-my_toggle_id" class="colomat-swap" style="display:none;">Collapse All Toggle</span>

<span class="collapseomatic setall noarrow" id="my_other_toggle_id" title="Expand Group 1" data-togglegroup="group_1">Expand Group 1 Toggle</span>
<span id="swap-my_other_toggle_id" class="colomat-swap" style="display:none;">Collapse Group 1 Toggle</span>

Demo

Expand Elements

main 1
This is the first main section and it has multiple sub sections:
sub a
sub section a
sub b
sub section b
sub c
sub section b
main 2
This is the second main section and it has multiple sub sections:
sub d
sub section d
sub e
sub section e
sub f
sub section f

Shortcode Triggers

Expand All
Expand Main
Expand Sub
Expand Group 1

Roll-Your-Own Triggers

Expand All
Collapse All
Expand All Toggle
Expand Group 1 Toggle

Orphan Element

This is an expand element is not grouped with anything.

Pee Wee The Loaner
I am a loaner, Dotty. There are things about you me wouldn’t understand…. you shouldn’t understand

Alt Attribute Removed

the alt attribute is causing the html to not validate properly. Here is a test to ensure it does not show up anymore:

[expand title="Expand all" swaptitle="Swap all" trigclass="setall" rel="main" notitle="true"]this is a test[/expand]
Expand all
this is a test

With SwapAlt:

[expand title="Monkey" alt="click for donkey" swaptitle="Donkey" swapalt="click for monkey" notitle="true"]this is a test[/expand]
Monkey
this is a test

Collapse-Pro-Matic Maptastic Resize Trigger

The maptastic class has two uses.

  1. The primary use is when a shortcode or other dynamically loaded element (such as a google map, for which the class is named) needs time and space to calculate it’s display size in the target.
  2. The secondary use is to initially ‘hide’ the targets off-page when many collapse elements are being used to prevent the ‘flickering’ effect where the hidden elements are displayed while the page loads, then are hidden once the javascript is finally triggered on document load.

In this post we focus on the primary use. To demonstrate this, we are going to add a google map in a collapse element without using the maptastic class. This is a standard google map embed direct form maps.google.com:

<iframe src="https://www.google.com/maps/embed?pb=!1m18!1m12!1m3!1d2370.176761299221!2d9.967689000000014!3d53.55461200000002!2m3!1f0!2f0!3f0!3m2!1i1024!2i768!4f13.1!3m3!1m2!1s0x47b18f6cbedab441%3A0x6678f70133d32916!2sMillerntor-Stadion!5e0!3m2!1sen!2s!4v1420013219192" width="800" height="600" frameborder="0" style="border:0"></iframe>
St. Pauli

That works fine, because the map has iframe has a specific width and height assigned.

Now we will assign a map using a google_maps shortcode and also assign the target a class of maptastic. maptastic is a class that is part of the collapse plugin:

.maptastic {
    position: absolute !important;
    left: -10000px !important;
    display:block !important;
    max-width: 9999px;
}

All together, the complete shortcode will look like this:
(this is the one we need to fix… it should work with just maptastic)

[expand title="St. Pauli" targclass="maptastic"][google_maps id="1875"][/expand]
St. Pauli
[google_maps id=”1875″]

See how the map is not the correct width? But once we resize the window it will then display correctly.

Now we are going to create a new class for our target that gives it a width of 100%

.mapclass {
   width: 100%;
}

and assign it to the target as well:

[expand title="St. Pauli" targclass="maptastic mapclass"][google_maps id="1875"][/expand]
St. Pauli
[google_maps id=”1875″]

This is the map without being placed in an expand element:

[[google_maps id="1875"]]
[google_maps id=”1875″]

This is w/o using maptastic and just using expand=”true”:

[expand title="St. Pauli" expanded="true"][google_maps id="1875"][/expand]
St. Pauli
[google_maps id=”1875″]

Everything is fine. OK… we need to tweak maptastic.

Collapse-Pro-Matic New Slide Effect: Toggle

This is a test of the new slide effect for that has been added to Collapse-Pro-Matic version 1.1.6.

For this to work on ALL expand elements, simply set the Animation Effect to Directional Slide in Collapse-Pro-Matic options page. To set only a single expand element using the shortcode, the animation_effect attribute set to ‘toggle’:

[expand title="Trigger" animation_effect="toggle" direction="left"]Target Content[/expand]
Trigger
Target Content

To best appreciate how this effect works, it would be best to create a target with a fixed width and height. Using the roll-your-own method the attributes are assigned using data-* format. Here is an example that wraps a fixed size target element in a slightly larger container:

<div class="collapseomatic" id="hortest" title="Trigger" data-animation-effect="toggle" data-direction="left">Trigger One</div>
<div style="width: 400px; height: 400px; border: 1px dotted #ccc;">
<div id="target-hortest" class="collapseomatic_content" style="width: 300px; Height: 300px; background: #ccc;">Target Content</div>
</div>
Trigger One
This is the target content div that is linked to the trigger one above. It is wrapped in a div so that there is no change to the vertical size of the page when it slides on and off.
Trigger Two
This example has no wrapping div, lets see what happens to the vertical scroll of the page when it slides on and off page.

Collapse-Pro-Mtic 1.1.6 includes three new attributes that override the global default settings, allowing single expand elements to have there own animation-effect, distance and direction attributes. Using the roll-your-own method they defined using the data-* attribute like so:

<div class="collapseomatic" id="hortesthree" title="Trigger" data-animation-effect="toggle" data-direction="right">Trigger Three</div>
Trigger Three
This example should slide in from the right
Trigger Four
This example should slide both… whatever that is

Collapse-O-Matic ImageMap Test

Anne asks: Is there a way to use this plugin with image maps?

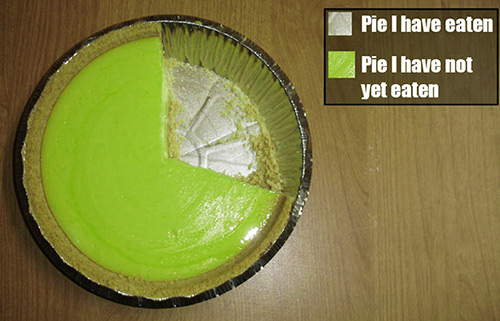
And by ‘this plugin’ she means Collapse-O-Matic. Well, Anne, that’s a good question! Let’s see what we can figure out here. First we need an image with an image map. We’ll pick something easy… like this:

pie_chart_500

Pie I have not yet eaten
The pie is a lie

Now clearly we will need to use the roll-your-own method to assign the triggers and target elements. So each of the image map area elements will need the collapseomatic class assigned. And since we do not want arrows assigned, we will also give each area element the class of noarrow.

<area id="noteaten" class="collapseomatic noarrow" shape="poly" coords="x, y, z, n" />

Now we just need to add in our target elements:

<div id="target-noteaten" class="collapseomatic_content ">Target Content</div>

Collapse Commander expand_trig & expand_targ Test

Standard Use of Collapse Commander’s expand_trig and expand_targ shortcodes:

This is the trigger
[expand_trig cid="1537"]

I’m a little donkey

This is the target:
[expand_targ cid="1537"]

short and stout
short and stout
Stuck in a manhole cover until someone pulled me out.

Note the above Collapse-Commander expand element had a default ID assigned. Currently, if a default ID has been assigned, the ID can-not be override with a shortcode attribute. This would not work:

[expand_trig cid="1537" id="donk"]
[expand_targ cid="1537" id="donk"]